Monday, September 30, 2013

DRBD Configuration

In order to configure DRBD we need to follow these simple steps.

1. Have a root access on each servers
2. Using GPARTED create partition on both servers with a capacity of at least 2.0GB. Remember to take note of the name of the partitions since were gonna use them both in the configuration.

Creating partition using GPARTED
3. After creating partitions you can now configure the drbd.conf  file. This is located in /etc/drbd.conf. You can use Vi, Gedit or anything that is comfortable to you.

NOTE : Before configuration you need to do these steps first.
3.1 Rename each servers accordingly by doing this commands on the terminal.
    a. hostname [your_hostname] (eg. hostname drbd01).
    b. edit /etc/hostname then change the value with the respective hostname you used.
3.2 Acquire each of the computer's IP address by typing IFCONFIG.

After doing this two steps we can now configure drbd.conf. Just input the values similar to the image below on both computers or on the server1 alone then using scp just copy it to the second server (tests connectivity too!). 
DRBD Configuration
As you can notice we will use the hostname, partition name and the ip address of both servers in the configuration so make you sure you have taken note of this properly.

4. After configuring drbd.conf we can now start the drbd by typing /etc/drbd.init start (you can also replace start with restart if the service is already running for the configuration to take effect). The following responses should appear as shown in the image below. Do this on both servers.
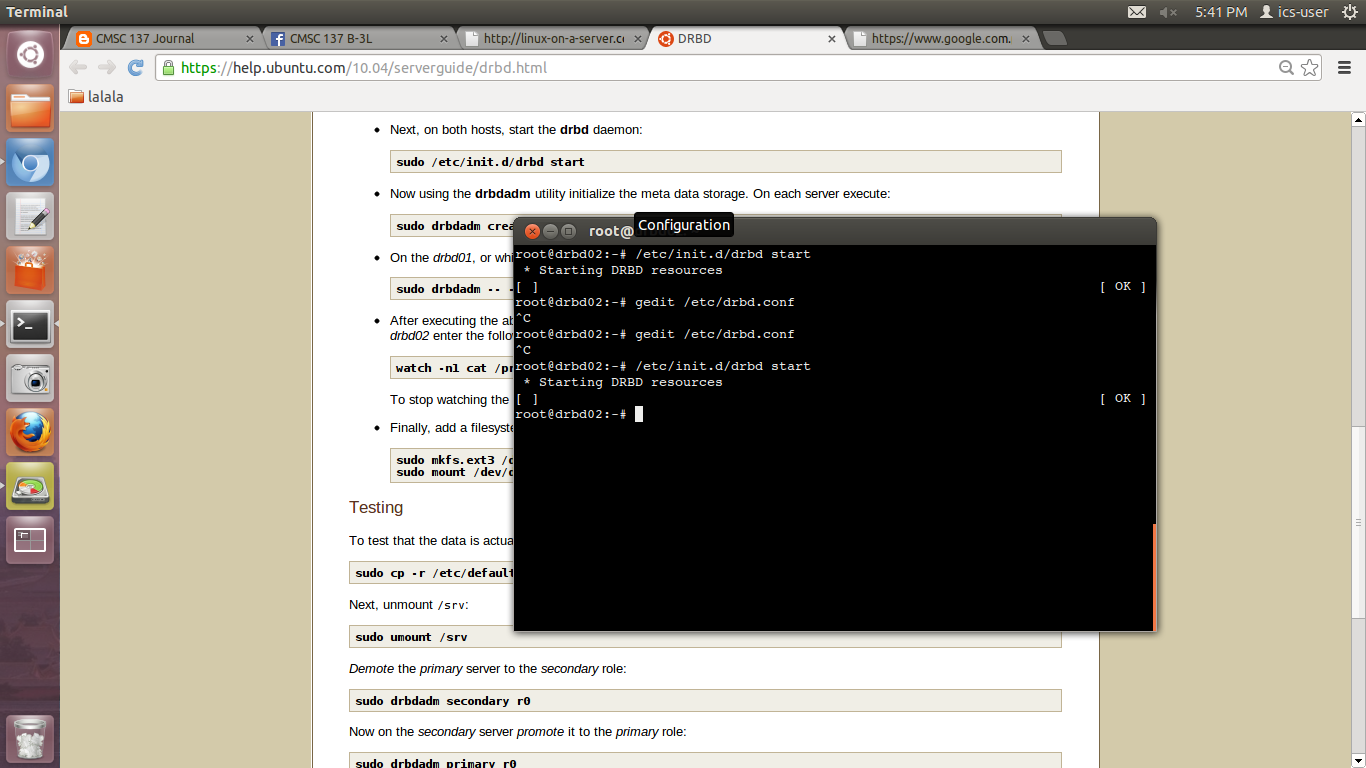
Initializing DRBD
5. After starting DRBD you need to initialize the metadata by typing sudo drbdadm create mdr0. Afterwards on server1 type sudo drbdadm -- --overwrite-data-of-peer primary all. This line of code will allow replication of data on all servers whenever the data in the PRIMARY server is modified. Type can check the connectivity of server 2 to server 1 by typing watch n1 cat /proc/drbd. This monitors the process of server1 from server2.

Monitoring server1
6. Finally we can now mount the partition we created on both servers by doing these commands.
    a. sudo mkfs.ext3 /dev/drbd0
    b. sudo mount /dev/drbd0  /srv

Mounting the partition created
7. Now that we have successfully configured DRBD we can now check if the configuration works properly. Copy any file into the partition from the Primary server and these changes should also be reflected on server2.

Monday, September 2, 2013

DRDB


PART I. MySQL and WebPage

The exercise is divided into two parts

A. Install PHP and MySQL
B. Create a simple webpage with 3 functionalities
    1. Sign In
    2. Sign Out
    3. Register

Task A.

Installing apache2: to install type sudo apt-get install apache2

Apache1

Apache2

Installing MySQL: to install type sudo apt-get install mysql-server. After installing test the mysql if it is working properly (see 4th picture)
MySQL 1

MySQL 2

MySQL 3

Creating table
Installing Php5: to install type sudo apt-get install php5 libapache2-mod-php5. After installing verify it through localhost. It can now successfully read .php files
Php 1


Php 2

Php 3

Task B.


In this task we are to create a simple web page. With the functionality given above. Here are the screenshots of the webpage. This was created using HTML 5, CSS and PHP.


Register Page
Sign In Page


Search Page
Search Result

Part 2. GParted and DRBD configuration.

A. GParted

GParted is a partitioning tool used to separate the hard disk into multiple spaces. I have used a different partition tool long time ago, but in essence what it does is it provides a separate storage.

For example:

We have hard drive capacity of 180GB, we can divide it into 3 parts, 80 GB for OS1 80 GB for OS2 and 20GB for the bootloading and other hardware files/configurations that are needed.

To configure

1. Open GParted. A prompt should appear asking for a password. (Type "user" in our case).


2. After opening we should see something like this.


3. To Configure
  3.1 Select an unallocated parition.
  3.2 Click New

  3.3 Set the New Size to 2056 MB ~ 2GB


  3.4 Click Add : after clicking add the partition should appear.


3.5 Apply : the changes you made would be useless unless you apply them. To apply go to
Edit->Apply All Operations.


Now you have successfuly created your own partition.

B. DRBD Configuration

1. Installation : DRBD is already installed
2. Configuration : 

2.1 Set up the two machines

We can do this by using the previous setup we have learned
* on terminal type hostname drbd-1 on server 1 and drbd-2 on server2
* edit /etc/hostnames, change it to drbd-1 and 2 accordingly
* assign a static ip on both machines. using ifconfig. assign 192.168.0.1 on server 1 and 192.168.0.2 on server 2
* edit /etc/hosts then include both machines with their respective IP's
* reboot
* configure /etc/drbd.conf


* start drbd if it returns an error that says no meta-data found type drbdadm create-md r0


Starting DRBDADM

Starting DRBD
* the partitioning of the other machine is not yet completed