In this session we have discussed IP Routing.
At the end of the session designed a network using the Network Simulator (netsim3.0) created by M.Detras and V.Lee.
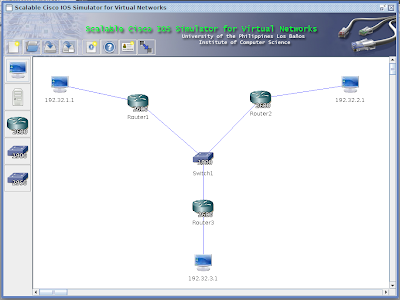 |
| Final Network Design |
So how did we accomplish this desgin?
First let's start at the fundamentals of connecting 2 Computers
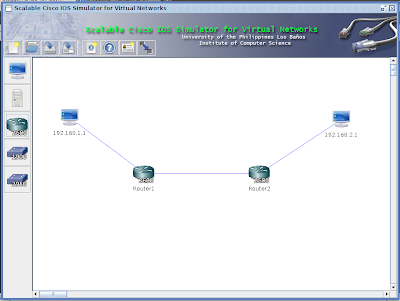 |
| Basic Connection Between 2 Computers |
In order to achieve this we must follow these simple steps
Step 1: Instantiate the Objects.
- Click the button on the left side to create the appropriate objects accordingly and rename them according to the figure.
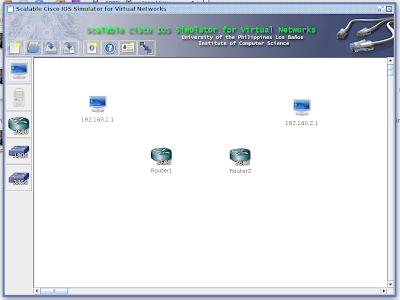 |
| Step 1: Instantiate the Objects |
Step 2: Connecting The Objects
- After instantiating we must connect the objects
- For Host -> Router
- Right Click Host
- Select Add Connection
- Click the red text "ether0/0"
- Connect it to its corresponding router selecting also "fastethernet0/0" as a port
- fastethernet0/0 is used in connecting Host to Network
- Do this to the other Host
- For Router->Router
- Right Click Router
- Select Add Connection
- Since we connected the "fastethernet0/0" it should be lit green
- Now Select "ethe0/1"
- Connect it to the other router by also selecting "ether0/1"
- Now we have established to create a connection between 2 networks
|
Output
|
Step 3: Configuring the Connection
- After doing step 2 we just accomplished the hardware part, now we need to configure it so the hosts can communicate with one another
- Right Click the 1st router then click configure
- Type this set of commands to assign an IP address of fastEthernet0/0 port (Host -> Router). This represents the set of all addresses in the network of Router1
Creating a network connection is quite a tedious task. You also need to be careful in putting the values because one wrong value can result to a lost of connectivity.


No comments:
Post a Comment